Embroider Along - Sewing machines, bobbins and more
- Bernadette Hoy
- Oct 1, 2021
- 4 min read
Welcome back. I hope you had a chance to sew during the week
I wanted to talk to you about a couple of things this week
The first is an error I picked up in the pattern which you probably have as well. Are you missing an "r"? ...I am.
The pattern asks for one "r", but you will need 2. Please stich an extra one if you have not done so already. Also update your pattern so you remember if you make a second quilt.


The second is the order of stitching and stitching and why it happens like that.
I am going to do this based on the sewing machine embroidery as it is one of the more complicated designs.
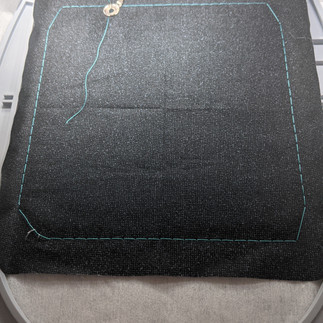
Colour 1 (photos 1 and 2) is the basting stitch that I have turned on. I have done this to stabilise the background fabric. If you have not activated this feature our thread colour numbers will differ by 1 from mine.
Photo 3 shows the basting stitch (1) completed and thread colour 2 (shown on screen in photo 4). Colour 2 is the placement area for your fabric. You can see in photo 5 that I have overlaid the fabric to cover this area well.
Colour 3 - photos 6 and 7 - then stitches the fabric down ready for cutting back - photo 8 shows after cutting.
Colour 4 - photo 9 - shows the satin stitch that it will now do around part of the machine fly wheel
Colour 5 is the placement stitch for the spool of thread - photo 1 below.
Photos 2 and 3 show this stitching
Photo 4 shows thread colour 6 which stiches the fabric down in place - photo 5. Which is then cut back in photo 6.
Photo 7 shows - thread colour 7 which is the placement stich for the satin stitch on the spool. Stitched in photo 8.
Thread colour 8 - shown below in photo 1 and stitched in photo 2 is where the "thread" fabric on the spool is to be placed - photo 3
It is stitched down in colour 9 - photo 4.
You then cut it back - photo 5 - and then it is satin stitched all the way around in colour 10 - photos 6 and 7.
When I did my first sample of this design I noticed that the stitching on the sewing machine needle that happens in Colour 11 (photo 1 below) is dense and I had not basted around the design as I have instructed you to do. You can see in photo 2 below that the fabric around the needle is pulling. This does stabilise better once the stitching continues, however you can see here that the sample here is basted. My first one pulled a lot more. You will need to keep an eye on this.
The other thing that you need to be aware of here is that in one of the sewing machine designs the thread on the spool and the needle are one thread colour. If you do not want this to be the case you will need to manually stop your machine and rethread it at the correct time. You could thread this machine with a grey spool of thread and not worry. If however you are sewing hot pink thread you may want to be aware of this.

Thread colour 12 (photo 1) is the placement stitch (photo 2) for the sewing machine applique fabric (photo 3).
Thread colour 13 (photos 4 and 5) is the sew down of the applique fabric and photo 6 shows after I have cut it back.
Photos 6 and 7 show the satin stitch to finish the sewing machine body.
You might be able to see here that the needle stitching does look better.
The sewing machine is nearly finished. We just have the screen and knobs to go.
Photos 1 and 2 show thread colour 15 which is the fabric placement.
Photo 3 shows this stitching.
Photo 4 shows the applique fabric placed and being stitched down. Thread colour 16 in photo 5.
Photo 6 is where I have cut is back.
Photos 7 and 8 show the satin stitch to complete this design.
Now here is where I go maybe I have stuffed this up. Some designs now have a triple satin stich around them. Maybe I keep removing the hoop at this point and get confused about which do and do not. You may want to pay careful attention at this point be a little clearer and more certain than me LOL. I suggest that for the designs that do have this stitch to have it match your background fabric if there are lots of colours around the outside of the design such as the machine.
Go ahead and sew out all 5 sewing machines. I suggest you sew out the scissors as well. For those that do not have a lot of hoop size options please look at the below video.
Scissor design and placement
I think that is enough for this week.
Happy stitching
Bernadette


Comments